Getting Started with LAVA, Docker, and a FRDM-K64F:
- Kumar Gala (Deactivated)
- Paul Sokolovskyy
- David Brown
Introduction
This document describes how to install and configure LAVA in a Docker containerized setup, as used by LITE engineers for local development and testing. Besides set up of LAVA per se, it also describes how to connect a microcontroller board for testing, taking an NXP FRDM-K64F board as an example. The process can be applied to other boards in similar way.
The document logically consists of 2 parts:
- Detailed, step-by-step walkthru of setting up a LAVA system manually for the first time. You are recommended to follow this process at least once to be familiar with the components and steps involved, as well how to troubleshoot them.
- A semi-automated setup, which can be used for repeated (re)setups. While this method saves a great deal of time (a new LAVA install can be brought up literally in 5 minutes), it requires some prior experience with LAVA setup and understanding of the steps involved, as well as ability to diagnose and debug any issues. So, the use of this method logical comes after getting familiar with p.1 above.
Prerequisites
- A relatively modern Linux system. This has been tried on Fedora 29 and Ubuntu 18.04, and Ubuntu 16.04 (However on 16.04 you need updated python packages, details below). (For Fedora 32, see this page). This has been shown to work in VM based install.
- root/sudo access on host system. Root access is needed to add udev rules, install a few utilities, and run the udev-forward.py script.
- FRDM-K64F board with relatively fresh DAPLink firmware. A rule of thumb is that if when connecting via USB, the boards mounts a USB drive without DETAILS.TXT file, you should upgrade. We try to standardize on version 0246 of the DAPink. See corresponding section for more information.
Setup Host System
Install Docker
Use the following link for instructions on how to install docker: https://docs.docker.com/install
On distributions like Fedora & Ubuntu its recommend to add your local user to the docker group as this will prevent you from having to use sudo to run the docker commands. You can use the following command to add your user to the docker group:
sudo usermod -aG docker <USERNAME>
- Note: The instructions that follow assume you are in the docker group and don't need
sudoto run docker. If you don't add yourself you will need to explicitly addsudoin front of the docker commands. - (OPTIONAL) Proxy Setup - If you are behind an http proxy, follow these instructions:
Install Docker Compose
Use the following link for instructions on how to install Docker Compose: https://docs.docker.com/compose/install/Install python packages
( Note: These need to be installed such that they are able to run as root - either use systems packages or install in root user (
sudo pip3 install --user):
Major distributions have packages for pydev >= 0.18 and docker >= 2.0
For Ubuntu 18.04:sudo apt-get install python3-pyudev python3-docker
For Ubuntu 16.04:
Specific action is required because the distro package versions are too old.
sudo pip3 install -U --user pyudev docker
If this doesn't work, you need to run the command in "sudo su -" shell.
pip3 install -U --user pyudev docker
NOTE: It might require to first export proxy settings in the shell.
For Fedora:
sudo dnf install python3-pyudev python3-docker
NOTE: Use only if you aren't able to find distro packages (or they're very old) for
pyudevanddockerpython packages.sudo pip3 install -U --user pyudev docker
Install
lavaclipip3 install --user lavacli
Determine Serial Number for board
udevadm monitor -e | grep -i ID_SERIAL_SHORT
Plug in board, should see some output like:
ID_SERIAL_SHORT=0240000031754e45001c0019948500046461000097969900
ID_SERIAL_SHORT=0240000031754e45001c0019948500046461000097969900
ID_SERIAL_SHORT=0240000031754e45001c0019948500046461000097969900
ID_SERIAL_SHORT=0240000031754e45001c0019948500046461000097969900
Clone Git Repo
git clone -b lite https://github.com/Linaro/lite-lava-docker-compose
Install
usb-passthroughin/usr/local/binsudo cp lite-lava-docker-compose/contrib/usb-passthrough /usr/local/bin
Modify
lite-lava-docker-compose/contrib/LAVA.rules
Replace
MYSERIALNUMwith serial number from step 4.# Example LAVA.rules for USB passthrough to container # # Assumes that usb-passthrough script is installed in # /usr/local/bin/passthrough # Pass all usb devices (TTY, block, CDC) to lava-dispatcher container # FRDM-K64F ACTION=="add", ENV{ID_SERIAL_SHORT}=="MYSERIALNUM", RUN+="/usr/local/bin/usb-passthrough -a -d %E{ID_SERIAL_SHORT} -i lava-dispatcher" # Pass TTY through to lava-ser2net container ACTION=="add", SUBSYSTEM=="tty", ENV{ID_SERIAL_SHORT}=="MYSERIALNUM", RUN+="/usr/local/bin/usb-passthrough -a -d %E{ID_SERIAL_SHORT} -i lava-ser2net"Change line #8 and #10 to look like:
# Example LAVA.rules for USB passthrough to container
#
# Assumes that usb-passthrough script is installed in
# /usr/local/bin/passthrough

# Pass all usb devices (TTY, block, CDC) to lava-dispatcher container
# FRDM-K64F
ACTION=="add", ENV{ID_SERIAL_SHORT}=="0240000031754e45001c0019948500046461000097969900", RUN+="/usr/local/bin/usb-passthrough -a -d %E{ID_SERIAL_SHORT} -i lava-dispatcher"
# Pass TTY through to lava-ser2net container
ACTION=="add", SUBSYSTEM=="tty", ENV{ID_SERIAL_SHORT}=="0240000031754e45001c0019948500046461000097969900", RUN+="/usr/local/bin/usb-passthrough -a -d %E{ID_SERIAL_SHORT} -i lava-ser2net"
install
udevrule filesudo cp lite-lava-docker-compose/contrib/LAVA.rules /etc/udev/rules.d/
Building & Starting up the LAVA Docker images
The following steps are related to getting docker to build and startup the containers for LAVA. The docker-compose setup allows for us to coordinate multiple container instances together for the LAVA setup. The docker-compose repository includes a
docker-compose.yaml
that describes the setup and configuration of the the LAVA containers. The repository is based on the upstream LAVA project docker-compose repo. The majority of changes are related to connecting microcontroller-class boards. The two major changes are having a lava-dispatcher with additional software (flashing tools like pyOCD) and setting up a ser2net server to connect to the serial ports on the boards.
NOTE: Disconnect board before doing these steps.
NOTE: sudo is required on the docker-compose and make steps if your user isn't part of the docker group
NOTE: Commands are relative to the lite-lava-docker-compose
directory from here forward.
Optional: Setup access for local IP/host
If you are running lava on a machine with a fixed IP (eg: a dedicated computer on your local network) you will want to modify the overlays/etc/lava-server/settings.d/01-unsecure.yaml
ALLOWED_HOSTSline to add the ip or hostname of the machine. In the example below, the ip192.168.1.14was added, you'll want to keep127.0.0.1andlocalhost.HTTPS_XML_RPC: false CSRF_COOKIE_SECURE: false SESSION_COOKIE_SECURE: false ALLOWED_HOSTS: ["192.168.1.14", "127.0.0.1", "localhost"]
- Optional: Add the proxy settings in lite-lava-dispatcher and ser2net images
It might be required to define proxy setting in lite-lava-dispatcher/Dockerfile and ser2net/Dockerfile
ENV http_proxy=http://<user>:<pwd>@<proxy>:<port>
ENV https_proxy=http://<user>:<pwd>@<proxy>:<port>
- Optional: Configure DNS in /etc/docker/daemon.json
Do this only if you are sure you need this. Otherwise, hardcoding a particular (local) DNS server may lead to issues when using another network connection, etc.
Get host DNS:
nmcli dev show | grep 'IP4.DNS'
Set reported value in /etc/docker/daemon.json:
{
    "dns": ["w.x.y.z"]
}
Restart docker:
sudo service docker restart
Run commands to build docker images and startup lava
docker-compose build
make
You'll see output of docker fetching and building the images, and then all LAVA containers starting up, followed by a fair amount of logging from LAVA itself as it starts up. This may take a few minutes to complete.
Here are some examples of the output one can expect during this phase:
Docker Compose/Build Phase
galak@ubuntu:~/lite-lava-docker-compose$ make
docker-compose up
Creating volume "lava-server-pgdata" with default driver
Creating volume "lava-server-devices" with default driver
Creating volume "lava-server-health-checks" with default driver
Creating volume "lava-server-joboutput" with default driver
Pulling db (postgres:11.2-alpine)...
11.2-alpine: Pulling from library/postgres
bdf0201b3a05: Pull complete
365f27dc05d7: Pull complete
bf541d40dfbc: Pull complete
823ce70c3252: Extracting [========>                                          ]  4.194MB/25.04MB
a92a31ecd32a: Download complete
83cc8c6d8282: Download complete
7995b9edc9bf: Download complete
7616119153d9: Download complete
b3f69561e369: Download complete
Lava containers being created
Creating lava-server-db  ... done
Creating lava-dispatcher ... done
Creating lava-ser2net    ... done
Creating lava-publisher  ... done
Creating lava-master     ... done
Creating lava-logs       ... done
Creating lava-server     ... done
Creating apache2         ...
Lava starting up
lava-master        |   Applying lava_results_app.0012_namedtestattribute_metadata... OK
lava-server        | .
lava-master        |   Applying lava_results_app.0013_buglinks... OK
lava-master        |   Applying lava_results_app.0014_xaxis_maxlength_increase... OK
lava-master        |   Applying dashboard_app.0002_auto_20140917_1935... OK
lava-logs          | .
lava-master        |   Applying dashboard_app.0003_auto_20140926_1208... OK
lava-master        |   Applying dashboard_app.0004_imagereportchart_is_delta... OK
lava-dispatcher    | 2019-05-09 19:01:08,522   DEBUG [BTSP] Checking master [lava-master:5556] to create socket for lava-dispatcher
lava-dispatcher    | 2019-05-09 19:01:08,524   DEBUG [BTSP] socket IPv4 address: 172.18.0.6
lava-dispatcher    | 2019-05-09 19:01:08,525    INFO [BTSP] Greeting master => 'HELLO_RETRY' (using the same version?)
lava-master        |   Applying dashboard_app.0005_imagereportchart_chart_height... OK
lava-master        |   Applying dashboard_app.0006_auto_20141028_1146... OK
lava-master        |   Applying dashboard_app.0007_imagereportchart_chart_visibility... OK
lava-server        | .
lava-master        |   Applying dashboard_app.0008_imagechartfilter_is_all_tests_included... OK
Lava idle
lava-dispatcher    | 2019-05-09 19:03:21,510   DEBUG PING => master (last message 20s ago)
lava-master        | 2019-05-09 19:03:21,513   DEBUG lava-dispatcher => PING(20)
lava-dispatcher    | 2019-05-09 19:03:21,519   DEBUG master => PONG(20)
lava-master        | 2019-05-09 19:03:36,201    INFO scheduling health checks:
lava-master        | 2019-05-09 19:03:36,205    INFO scheduling jobs:
lava-master        | 2019-05-09 19:03:38,651   DEBUG lava-logs => PING(20)
lava-logs          | 2019-05-09 19:03:38,648   DEBUG PING => master
lava-logs          | 2019-05-09 19:03:38,657   DEBUG master => PONG(20)
lava-master        | 2019-05-09 19:03:41,549   DEBUG lava-dispatcher => PING(20)
lava-dispatcher    | 2019-05-09 19:03:41,546   DEBUG PING => master (last message 20s ago)
lava-dispatcher    | 2019-05-09 19:03:41,555   DEBUG master => PONG(20)
lava-master        | 2019-05-09 19:03:56,221    INFO scheduling health checks:
lava-master        | 2019-05-09 19:03:56,225    INFO scheduling jobs:
lava-logs          | 2019-05-09 19:03:58,681   DEBUG PING => master
lava-master        | 2019-05-09 19:03:58,684   DEBUG lava-logs => PING(20)
lava-logs          | 2019-05-09 19:03:58,690   DEBUG master => PONG(20)
lava-master        | 2019-05-09 19:04:01,579   DEBUG lava-dispatcher => PING(20)
lava-dispatcher    | 2019-05-09 19:04:01,577   DEBUG PING => master (last message 20s ago)
lava-dispatcher    | 2019-05-09 19:04:01,584   DEBUG master => PONG(20)
Verify lava is running
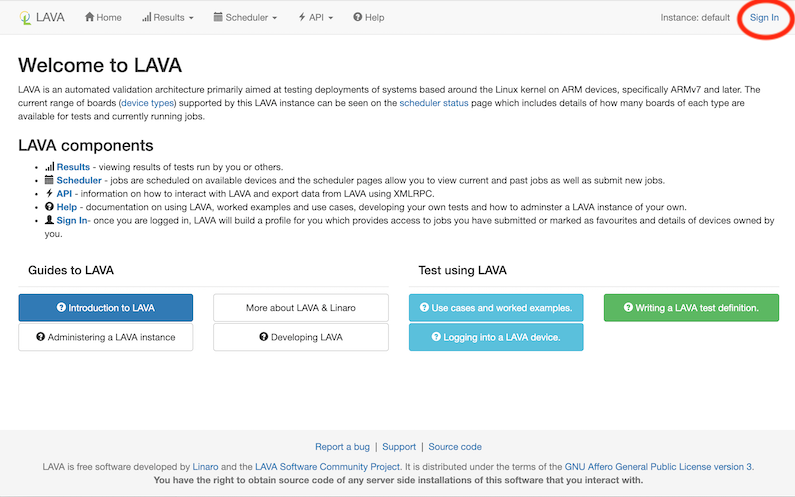
You can verify that lava has completed startup by trying to connect to the LAVA webserver in a web browser by going to localhost.
Here's what the startup webpage should look like in your web browser:
Setup User & Token
Now that LAVA is running we need to setup an user with admin privileges and an API token that will get used by
lavacli
to allow us to add the board configuration to LAVA and submit jobs.
Add a user
Replace <
USERNAME> and <PASSWD>, if this command is successful there will be no output.docker exec -it lava-server lava-server manage users add <USERNAME> --superuser --staff --passwd <PASSWD>
Login in & Create API token
Now that we have a user created we need to go back to the web browser and login to create an API token. The API token is used by software likelavaclito connect to Lava's XML-RPC API interface. To login in, there should be a Sign In link on the top right of the starting webpage. Or you can try and go to this URL: http://localhost/accounts/login/?next=/ (if you are connecting via a fixed ip/host replacelocalhosthere with that IP/hostname).
Login Page: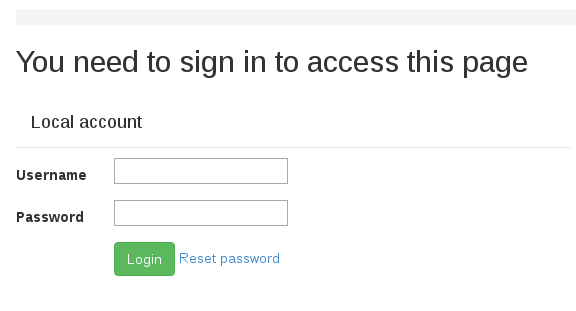
Now log in with the<USERNAME>and<PASSWORD>that were used in step 1 of this section.- Create API token
Now that we are logged in we need to create the API token. Follow the steps documented here to create a token:
https://master.lavasoftware.org/static/docs/v2/first_steps.html#authentication-tokens
Make sure to copy the token value as we will need it in the next step. Setup lavacli identities with API token
The
lavaclitool allows us to issue various commands to Lava on the command line. This tool utilizes the API token to authenticate. It can be configured with different identity profiles. The command below adds an identity called 'lava-docker'. Then in futurelavaclicommands we can dolavacli -i lava-docker <CMD> <...>. Note: if we have lava setup on a fixed IP/hostname you can replacelocalhostin the URL below with that IP/hostname. Replace<USERNAME>and<TOKEN>In the command below:lavacli identities add --username <USERNAME> --token <TOKEN> --uri http://localhost/RPC2 lava-docker
Setup proxy settings for LAVA (optional)
If you are behind a proxy, you may need to add localhost in your 'no_proxy' environment variable in order for lava dispatcher to resolve it in subsequent commands:
export no_proxy="localhost,127.0.0.0"
The lava-master container also needs to have proxy settings setup. To do so, copy the env.yaml file from the container into a the 'overlays' directory on the host:
mkdir -p overlays/lava-master/etc/lava-server
docker cp lava-master:/etc/lava-server/env.yaml overlays/lava-master/etc/lava-server/env.yaml
Edit the file using your favorite editor to update the lines that define the proxy variables to match your settings:
# A dictionary of (key, value) that will be added to the inherited environment.
# If a key does not already exist in the inherited environment, it's added.
# default: an empty dictionary
overrides:
  LC_ALL: C.UTF-8
  LANG: C
  http_proxy: <replace with your proxy setting>
  https_proxy: <replace with your proxy setting>
Save the file. Then open 'docker-compose.yaml' in your favorite editor and add a line at the end of the lava-master's 'volumes:' section to automatically copy the file:
  lava-master:
    container_name: lava-master
    image: ${DC_SERVER_IMAGE}
    volumes:
    - devices:/etc/lava-server/dispatcher-config/devices:ro
    - health-checks:/etc/lava-server/dispatcher-config/health-checks:ro
    - ./overlays/lava-server/etc/lava-server/instance.conf:/etc/lava-server/instance.conf:ro
    - ./overlays/lava-server/etc/lava-server/settings.conf:/etc/lava-server/settings.conf:ro
    - ./overlays/lava-server/etc/lava-server/lava-master:/etc/lava-server/lava-master:ro
    - ./overlays/lava-server/etc/lava-server/dispatcher-config/device-types/frdm-k64f.jinja2:/etc/lava-server/dispatcher-config/device-types/frdm-k64f.jinja2:ro
    - ./overlays/lava-master/etc/lava-server/env.yaml:/etc/lava-server/env.yaml:ro
Save the file. Hit ctrl-c in the window where you previously typed 'make' to terminate the docker-compose session, and relaunch it by running 'make' again. Now the file would be automatically populated in the lava-master container.
Setup the board
Now that we've got Lava configured and running, lavacli setup, we now need to add the board to the Lava database of known hardware. First we need to register the device-type with Lava. Lava setups a number of known device-types (list of known device-types). For this example the FRDM-K64F board is a supported/known device type ( frdm-k64f ). Out of the box Lava is not configured to know about any device types. Device types are defined as YAML files and Lava utilizes jinja2 templates to describe configurable aspects of the YAML. Its outside of the scope of this guide on how to create a new device type.
Setup the device type
(Note how we use the
-i lava-dockeridentity we created in the previous steps).lavacli -i lava-docker device-types add frdm-k64f
When running this command, if you get an error such as "Unable to connect: 400 Client Error: Bad Request for url: http://<user>:<token>@localhost/RPC2", you need to set up proxy settings for LAVA as described in previous step.
Add a board instance
Now that the device-type is registered, we need to create a device instance. In the example below we are creating a device instance called
frdm-k64f-01 (the naming follows the Cambridge lab setup: https://lite.validation.linaro.org/scheduler/alldevices).lavacli -i lava-docker devices add --type frdm-k64f --worker lava-dispatcher frdm-k64f-01
Note: the
--worker lava-dispatcherargument in this command is used to specify the name of the Lava dispatcher that the board is physically connected to. The Lava architecture allows multiple dispatchers to be connected to a single server. The docker solution we are utilizing is configured for a single dispatcher called lava-dispatcher.Connect the board
Back in the Building & Starting up the LAVA Docker images section we mentioned to disconnect the board. Please connect the board back to your computer. If you didn't disconnect the board in the Building stage that's ok, please disconnect and reconnect the board. The reason we wanted the board disconnect until this point is that we wanted the docker container for the lava-dispatcher up and running before the board was connected. If you remember we added someudevrules back in the host setup stage. Those udev rules invoke theusb-passthroughutility. The purpose of that utility is to "setup" the various usb devices (serial, usb mass storage, debug) in the lava-dispatch container. The udev rules rely on the hotplug event associated with the board being plugged in. Thus if we plugged in the board before the docker containers were running the containers wouldn't know about the board.Generate the parameters for the board instance
Now that the board is connected we need to let lava know some details specific to this board. In the case of the FRDM-K64F board we need to let Lava know what the serial number of the board is, the device file for the mass storage device, and how to connect to the serial port. These parameters are specified in a jinja2 template format. There is a helper script that given the device type and serial number of the board will create or report information associated with setting up the board. Thecontrib/board-setup-helper.pyat a minimum needs the-d(serial number) and-t(device type - matches the lava device type) flags. We also specify the -u flag in our example to report the udev rules. Finally there are a-sand-boptions to specify the ser2net config filename and board jinja filename. By default the script will look to modifyser2net/ser2net.confif the-soptions is not specified and will create board.jinja2 if the-boption is not specified.contrib/board-setup-helper.pyhelpcontrib/board-setup-helper.py -h usage: board-setup-helper.py -d DEVICE_SERIAL_NUM -t DEVICE_TYPE [-s SER2NET_CONF] [-u] [-b BOARD_FILE] contrib/board-setup-helper.py -d <DEVICE_SERIAL_NUM> -t <DEVICE_TYPE>command to run
Here we use the serial number (0240000031754e45001c0019948500046461000097969900) and device type (frdm-k64f) from before. We also store board config in the file named frdm-k64f-01.jinja2 (device type, suffixed by board number, in case there can be several boards of the same type).contrib/board-setup-helper.py -d 0240000031754e45001c0019948500046461000097969900 -t frdm-k64f -u -b frdm-k64f-01.jinja2
output from command
Here we see that the -u option reports back the udev rules that we would need to add for this board. These rules match the ones we specified back in the host setup stage.ACTION=="add", ENV{ID_SERIAL_SHORT}=="0240000031754e45001c0019948500046461000097969900", RUN+="/usr/local/bin/usb-passthrough -a -d %E{ID_SERIAL_SHORT} -i lava-dispatcher" ACTION=="add", SUBSYSTEM=="tty", ENV{ID_SERIAL_SHORT}=="0240000031754e45001c0019948500046461000097969900", RUN+="/usr/local/bin/usb-passthrough -a -d %E{ID_SERIAL_SHORT} -i lava-ser2net"ser2net/ser2net.conf file
ser2net is a utility that allows exposing a serial port device as a network connection. We generate5001:telnet:0:/dev/serial/by-id/usb-ARM_DAPLink_CMSIS-DAP_0240000031754e45001c0019948500046461000097969900-if01:115200 8DATABITS NONE 1STOPBIT LOCAL max-connections=10
frdm-k64f-01.jinja2 file
As mentioned before, the frdm-k64f-01.jinja2 file provides unique details about the specific boardboard_id: serial numberusb_mass_device: device file for USB mass storage device that one would mount. We use the /dev/disk/by-id so that the name is persistent for the boardconnection_command: command to connect to serial port, the port number here matches theser2net.conffile.resets_after_flash: all newer daplink firmwares on the FRDM-K64F do not reset after the board is flashed. So, we set this option to "false". If you have very old DAPLink firmware and want to postpone upgrading it (not recommended), you can set this option to "true".{% extends 'frdm-k64f.jinja2' %} {% set board_id = '0240000031754e45001c0019948500046461000097969900' %} {% set usb_mass_device = '/dev/disk/by-id/usb-MBED_VFS_0240000031754e45001c0019948500046461000097969900-0:0' %} {% set connection_command = 'telnet ser2net 5001' %} {% set resets_after_flash = false %}
Set the device dictionary
Because of the client/server nature of Lava we need to tell the server to update the device dictionary for our specific board with the parameters for the board. We utilize
lavaclifor this purpose. The device dictionary is kept by the lava server and a full dictionary that is composed of the device-type template + the board specific dictionary are sent to the lava dispatcher on every job that is submitted. Thus any updates to the dictionary for a given board will take effect for any future job submissions.lavacli -i lava-docker devices dict set frdm-k64f-01 frdm-k64f-01.jinja2
Restart ser2net
Since we updated the ser2net.conf file we need to send a SIGHUP (-1) signal to the ser2net daemon to cause it to re-read the config file.
docker exec -it lava-ser2net sh -c 'kill -1 `cat /var/run/ser2net.pid`'
Starting the udev event forwarder
Some udev events are required to be seen by the lava dispatcher for it to function correctly. We have a utility that will forward udev events from the host system to the lava-dispatcher container. This utility has to be run as root to have the proper permission to function.
NOTE: how this utility functions is highly likely to change.
sudo contrib/udev-forward.py -i lava-dispatcher
Sending the board a job
Now that we've got everything set, we can try and send an actual job to the board. A job will try and fetch a binary to flash the board with from a URL. How job files are composed is outside of the scope of this guide. However, we provide an example job file to test and verify that everything is working. In the repository
example/lava.job
is a YAML structured job file. If you look at the file, you'll see a reference to
https://snapshots.linaro.org/components/kernel/zephyr/master/zephyr/frdm_k64f/3708/tests/subsys/logging/log_list/logging.log_list/zephyr/zephyr.bin
this file will be fetched and flashed to the board using the boot method
cmsis-dap
(which is specified in this file).
We utilize
lavacli
to submit the job file to the lava server. The command will return a number to the user which is the job number (ID). We can then utilize a web browser to see the results of the job.
Submit a job
Note: the second line is the output of submitting the job, with the job ID 1
lavacli -i lava-docker jobs submit example/lava.job
1
See job results
The job results are available at
http://localhost/scheduler/job/<JOB ID>. The case above, the job ID is 1, so the URL would behttp://localhost/scheduler/job/1. As with all other URLs, if you have a fixed IP/hostname you can replacelocalhostwith that IP/hostname.The following screen captures try to give a sense of the output you should see, it's not a complete log of everything you will see, however we do show the final output and passing of the test:
The start of the job: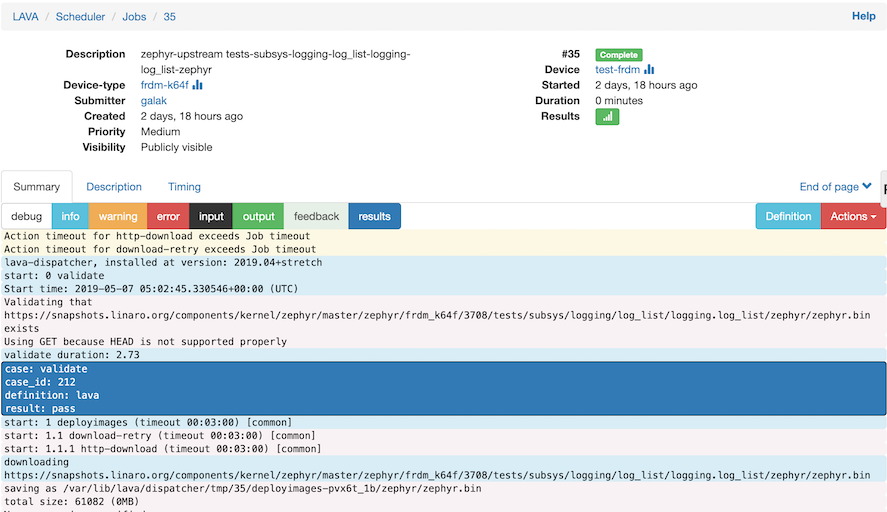
You might get the following certificate error.
Job error: Invalid job data: ["Unable to get 'https://snapshots.linaro.org/components/kernel/zephyr/master/zephyr/frdm_k64f/3708/tests/subsys/logging/log_list/logging.log_list/zephyr/zephyr.bin': HTTPSConnectionPool(host='snapshots.linaro.org', port=443): Max retries exceeded with url: /components/kernel/zephyr/master/zephyr/frdm_k64f/3708/tests/subsys/logging/log_list/logging.log_list/zephyr/zephyr.bin (Caused by SSLError(SSLError(1, '[SSL: CERTIFICATE_VERIFY_FAILED] certificate verify failed (_ssl.c:720)'),))"]
You then need to bind your host certificates to container by adding following line in lite-lava-docker-compose/docker-compose.yaml:
  lava-master:
    container_name: lava-master
    image: ${DC_SERVER_IMAGE}
    volumes:
    ...
    - /usr/local/share/ca-certificates:/usr/local/share/ca-certificates:ro
Then, run the following command in the container and go back to job start step.
update-ca-certificates
The job continues, we see some output result from the board in light green: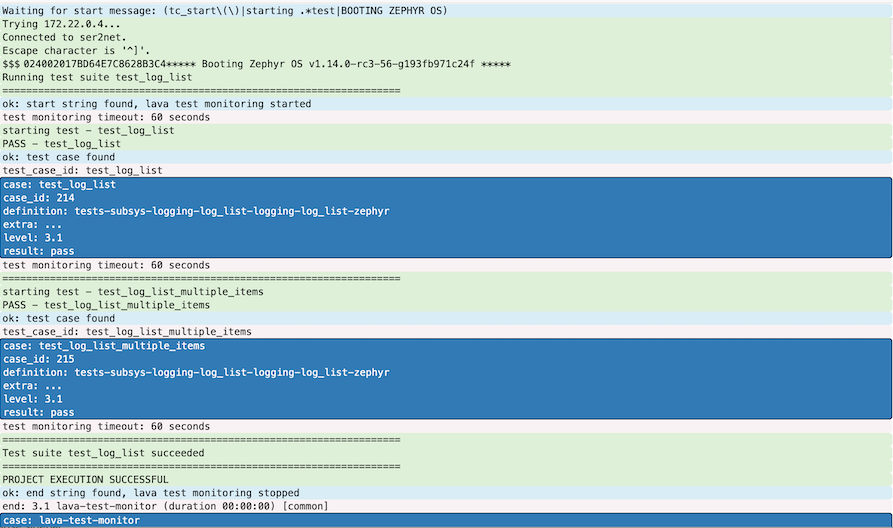
The Final output, we see the 'result:pass'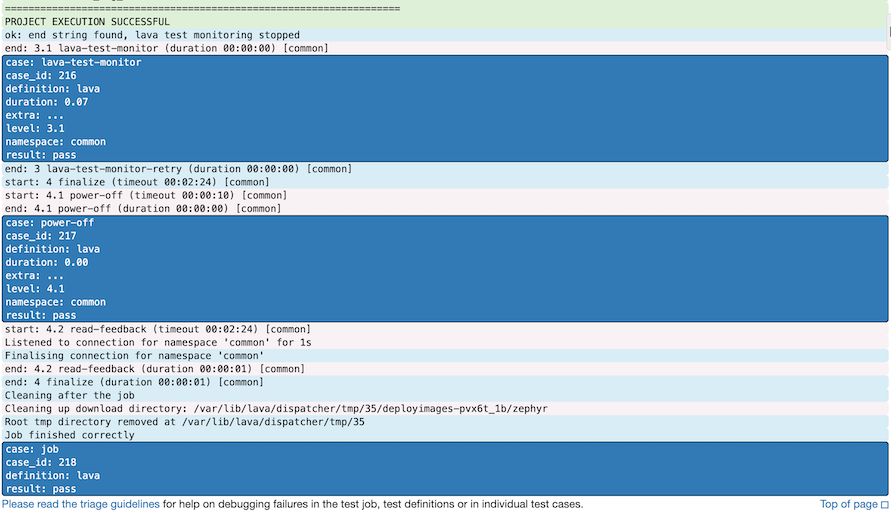
Bringing up LAVA setup after host reboot
At the time of writing, the docker-compose configuration is set to automatically start on system (re)boot. However, not all containers comprising the system may start up automatically. You check the status by going to lite-lava-docker-compose directory and running "docker-compose ps". Example output after system reboot is shown below (it may differ for your system):
     Name                    Command                State                           Ports
----------------------------------------------------------------------------------------------------------------
apache2           /root/entrypoint.sh              Up         5500/tcp, 5555/tcp, 5556/tcp, 0.0.0.0:80->80/tcp
lava-dispatcher   /root/entrypoint.sh              Exit 255
lava-logs         /root/entrypoint.sh              Up         5500/tcp, 0.0.0.0:5555->5555/tcp, 5556/tcp, 80/tcp
lava-master       /root/entrypoint.sh              Up         5500/tcp, 5555/tcp, 0.0.0.0:5556->5556/tcp, 80/tcp
lava-publisher    /root/entrypoint.sh              Up         0.0.0.0:5500->5500/tcp, 5555/tcp, 5556/tcp, 80/tcp
lava-ser2net      /bin/sh -c echo -n "Starti ...   Exit 255
lava-server       /root/entrypoint.sh              Up         5500/tcp, 5555/tcp, 5556/tcp, 80/tcp
lava-server-db    docker-entrypoint.sh postgres    Up         5432/tcp
As can be seen, lava-dispatcher and lava-ser2net containers didn't start up successfully. This usually can be rectified by running "docker-compose up". To bring up the system into a fully functional state, udev forwarder must be started manually too.
(Semi)Automated Containerized Setup
Setup instructions above provide a detailed walkthru on setting up and configuring a containerized LAVA system. They are useful for initial acquaintance with this setup, but include quite a number of manual steps. That gets cumbersome and error-prone when the system needs to be set up multiple times. And one of the advantages of cointainer-based setup is easy tear-down/start-from-scratch cycle, allowing to perform full validation of changes, etc. easily.
To accommodate a faster (re)setup, we have a Makefile targets which allow to make setup and configuration steps in semi-automated manner, considerably cutting on the bootstrap time. These Makefile targets are intended to be treated as "executable documentation": you aren't supposed to run them blindly, but rather read/review them first to understand what exactly they do. This automated setup isn't intended tobe a one-click solution - instead, a small (~5) macro-steps are provided, utilizing Makefile's "multiple entry points" nature. This allows a user to control when these steps are run, and most importantly, re-run to propagate updates to different parts of the system setup. Indeed, the frequency of running various steps is different, as noted below. It also isn't supposed to be one-size-fits-all solution - it's definitely open to further customization by individual users (actually, you need to customize it for your particular boards (USB serial numbers, etc.)).
Workflow with the automated setup:
- Clone the repository:
git clone https://github.com/Linaro/lite-lava-docker-compose(this will clone "lite" branch, which is the default branch for the LITE setup). - Start with plugging your board(s) into USB ports, and use "
udevadm monitor -e | grep -i ID_SERIAL_SHORT" command to note their serial numbers. Each number should be put into files nameddevices/<lava_device_name>.serial. <lava_device_name> is the name of device which will be created on the LAVA side, and should in turn follow <device_type>-NN naming pattern. For example, for a (first) FRDM-K64F board, the file name isdevices/frdm-k64f-01.serial - With all involved boards still connected to USB, run "
make board-configs". This will create (or update) contrib/LAVA.rules, devices/*.jinja2 etc. files, as described in the "manual" section of this document. You will need to re-run "make board-configs" whenever you add/remove boards, or have serial numbers change. make install- This will install files needed on the host, e.g. LAVA.rules and passthru script(s). Re-run this target when board set/properties (and thus LAVA.rules) changes.make build- Build docker-compose images. Re-run if image content is supposed to change (for example, after LAVA version upgrade).make (make all)- Start up containerize LAVA setup This also takes care of starting any host daemons (like udev forwarding daemon) too. In consequence, take care to unplug devices before this step and plug them back once daemons are in running idle.make lava-setup- Perform initial semi-automated LAVA configuration - run this once per LAVA setup, then can be run again to update configuration (see also sub-targets utilized by this target). It would attempt to setup all boards (Note: There may be some "soft" errors in the console output if some boards are not being connected and their board jinja files are missing (were not created with "make board-configs" above). These can be ignored if the board is not of interest to you.)make testjob- Submit a "smoke test" testjob running against a QEMU (follow it at http://localhost/scheduler/job/1)make stop- Stop LAVA setup (and any host-side daemons).make clean- Tear down current LAVA setup, losing all data (usemakefollowed bymake lava-setupto start again).
Generally, these targets fall in 3 categories:
board-configs,install- "host-side" setup, "run once", or whenever things outside specific LAVA container setup update.build- "run from time to time", e.g. when a new LAVA version is released.all,lava-setup,stop,clean- "container-side", "run everyday", use to manage lifecycle of current LAVA container.
Semi-automated setup without hardware boards
In some cases, it makes sense to setup LAVA without support for real hardware boards. In this case, you would be limited to just virtual devices (QEMU, docker), but nonetheless, that may be enough for various usecases. Among usecase for such a setup are:
- When you don't have hardware boards around.
- When you install LAVA on a secondary host, where you don't have/need board setup.
- When you want to check some general functionality of LAVA, not related to handling of hardware boards.
- When you just get acquainted with LAVA/semi-automated setup, and just want to get something working with minimal extra steps (and thus possible mistakes) to make.
- etc.
This setup is effectively a subset of full semi-automated setup described in the previous section. What is omitted is the setup of boards and host-side setup required to forward boards to containers, which simplifies the overall setup considerably. Specific (and concise) walkthru steps are:
- Make sure that Docker is installed and works.
git clone https://github.com/Linaro/lite-lava-docker-composecdlite-lava-docker-composemake(wait until the bring is finished)- (in another terminal window):
make lava-setup, follow the instructions. As you don't have configuration files for boards, there will be "soft" errors related to that, ignore them. make testjob
Capturing local board configuration for semi-automated setup
Oftentimes, the set of local development boards is static enough, and re-running "make board-configs" steps each time, as described in the section on semi-automated setup, is not needed. Instead, you can generate board configs once, and capture them in your repository, and keep them handy around for future (re)setups. This section describes suggestions and best practices for maintaining such a local setup on top of generic LITE setup
- Start with forking
https://github.com/Linaro/lite-lava-docker-composerepository on github. - Suppose, this will give you
https://github.com/pfalcon/lite-lava-docker-compose(instead of "pfalcon", you will have your own username). - Clone that repository locally with write access (e.g., use ssh access method).
- Make sure you are on the "lite" branch:
git checkout lite. - Create a branch for your personal setup (replace "pfalcon" with your own username):
git checkout -b pfalcon. - Run "
make board-configs" step as described above. - Commit any generated configs to you local personal branch.
- Afterwards, use your personal branch to run "
make all", "make lava-setup", etc. - To pick up any upstream changes, you would need to regularly rebase your personal branch on top of the "lite" branch, which gets regular updates:
git remote add upstreamhttps://github.com/Linaro/lite-lava-docker-compose(needs be run just once on first update)git checkout litegit pull --rebase upstream litegit checkout pfalcongit rebase litegit push --force- (Warning: alway rebase on the "lite" branch, not "master". If you rebase on "master" by mistake, you'll likely get conflicts. Run "
git rebase --abort" and retry.)
As an example of this setup, you can see pfalcon's setup:
- File view (board config files): https://github.com/pfalcon/lite-lava-docker-compose/tree/pfalcon/devices
- Change view (contains changes beyond just adding board config files, you of course can make further personal changes either): https://github.com/pfalcon/lite-lava-docker-compose/commits/pfalcon
Setup for development on LAVA master
NOTE: This section is RFC and WIP.
Sometimes, we need to not just use the recent LAVA release as is, but to fix a bug or add new feature to LAVA. This section outlines a (possible) process of making this possible.
Repository structure setup:
- In the same parent repository where you cloned lite-lava-docker-compose, clone https://git.lavasoftware.org/lava/lava (or, if you have an active user account on https://git.lavasoftware.org (recommended to submit changes back to LAVA), use "
git clone git@git.lavasoftware.org:lava/lava.git" ). Besides LAVA upstream repository, the LITE team also maintains own fork repository, used to integrate WIP changes from various LITE developers, before the changes are merged upstream. This repository allows different developers to have a common baseline, and help each other with testing. It's recommended to add it as an additional remote to the clone produced in previous step:
$ cd lava
$ git remote add lite git@github.com:Linaro/lite-lava.git
$ git fetch lite
$ git checkout lite
Following the setup above will allow one to easily access both upstream tags/branches (master, or particular release), and LITE team's own branches, and switching between branches is often required to contribute back to LAVA.
Using repository above in docker build:
Manual way: Go thru docker-compose.yaml, search for "../lava", and uncomment corresponding sections.
What to uncomment: Almost all our work on LAVA should/would concentrate on "dispatcher" component. Thus 2 code paths (../lava/lava_dispatcher & ../lava/lava_common) should be uncommented for "lava-dispatcher" container. lava/lava_common actually contains metadata about dispatcher components (actions, etc.), which also should be known to lava-server. So, need to uncomment ../lava/lava_common for lava-server. These 3 replaced components should cover majority of work we're doing. Uncomment anything else only if you know what you're doing and sure you need to replace other LAVA components beyond just the dispatcher (in this case, you would likely need to thoroughly replace all components in all containers).
After uncommenting, you would need to teardown the previous container setup ("make clean") and bring up new to include your changes ("make", followed by "make lava-setup"). Of course, this will clear the database and results of previous jobs. The same procedure should be followed when switching branches in the "lava" repository.
Automating dev setup: Manually uncommenting sections in docker-compose.yaml is cumbersome and error-prone. Instead, it's recommended to create a local branch in the lite-lava-docker-compose repo and capture these changes there, then rebase this branch when repo gets new changes. This setup is based on the "Capturing local board configuration" section above, and is a further extension to it. The recommended branch setup for your personal fork of lite-lava-docker-compose is:
- Follow instructions on creating a personal fork of the https://github.com/Linaro/lite-lava-docker-compose repository, and creating a personal branch in it.
- In the fork repository, "master" belongs to Linaro/lite-lava-docker-compose's upstream project (we never push anything there, but may cherry-pick from upstream from time to time).
- "lite" branch belongs to the LITE baseline setup. Each developer should be ready that it may be rebased on "master" occasionally.
- "<username>" is your personal branch, which captures configuration files for your boards, this allows to easily port your setup from machine to machine, and to track changes to it. E.g.: https://github.com/pfalcon/lite-lava-docker-compose/commits/pfalcon . You should rebase this branch onto "lite" regularly.
- "<username>-dev" is your personal branch for development setup. It contains changes described in this section above, and should be rebased on branch "<username>" regularly. E.g.: https://github.com/pfalcon/lite-lava-docker-compose/commits/pfalcon-dev .
Related information
FRDM-K64F CMSIS DAPLink firmware versions
Different FRDM-K64F boards in circulation have different CMSIS DAPLink firmware versions, which may affect board's use with LAVA (taking into account that there're different deployment methods - USB Mass Storage Device copying, pyocd, etc.) This section tries to enumerate versions seen, with notes on usage with LAVA. The version can be found via "DETAILS.TXT" file (or lack thereof) on board's emulated USB MSD device after plugging the board into host.
Very old version (No DETAILS.TXT file)
This is considered to be the oldest firmware, such old, that it didn't even version itself. It's recommended to upgrade this DAPLink firmware, to at least get identifiable version of it.
Version: 0226/Aug 24 2015 17:06:30
Contents of DETAILS.TXT:
Version: 0226
Build: Aug 24 2015 17:06:30
Git Commit SHA: 27a236b9fe39c674a703c5c89655fbd26b8e27e1
Git Local mods: Yes
This is version David and Paul originally had. Generally works well with LAVA, but requires "set resets_after_flash = false" in the board template.
Version 0246
Available at: https://github.com/ARMmbed/DAPLink/releases/tag/0246 . Download and extract the .zip file and copy file 0246_k20dx_frdmk64f_0x5000.bin to a board in bootloader upgrade mode (plug into USB with Reset button held).
Contents of DETAILS.TXT:
# DAPLink Firmware - see https://mbed.com/daplink
Unique ID: 0240000048824e45000b700bdd8900418761000097969900
HIC ID: 97969900
Auto Reset: 0
Automation allowed: 0
Overflow detection: 0
Daplink Mode: Interface
Interface Version: 0246
Git SHA: 0beabef8aa4b382809d79e98321ecf6a28936812
Local Mods: 0
USB Interfaces: MSD, CDC, HID
Interface CRC: 0x434eddd1
Remount count: 0
Useful link: MSD command documentation for 0246.
Reset udev-forward script
Please stop udev-forward script (Ctr+C) and run the command:
sudo contrib/udev-forward.py -i lava-dispatcher